Use the menu to bring up the user information dialog.
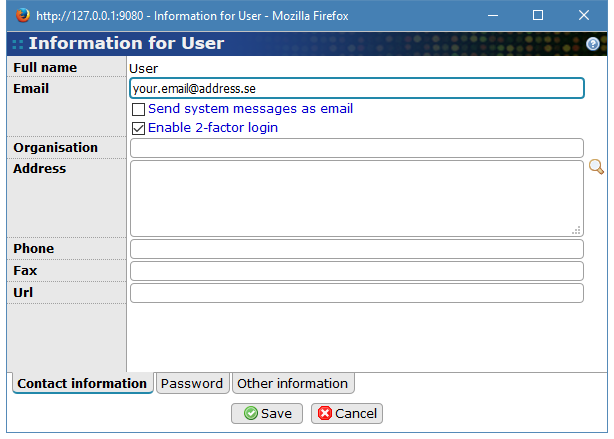
This dialog has three tabs, Contact information (selected), Password and Other information. The logged in user can update the following contact information details.
![[Note]](../../gfx/admonitions/note.png) |
Multi-user accounts |
|---|---|
|
If you are using a multi-user account, for example a demo-account, you do not have permission to change the contact information. |
- Full name
-
Your full name. You are not allowed to change this. If it is not correct, contact an administrator to do it for you.
-
Your email address (optional). If an email has been specified and if the server administrator has enabled email notifications, you also have the option to select if messages should be sent as emails. This can be useful to keep track of jobs that take a long time to complete.
- Enable 2-factor login
-
Enables 2-factor login for your account. This causes BASE to send out an email message with a one-time verification code the first time you login with an unknown device/browser. When you enable this option BASE will also send an email to verify your email address. Note that this option is only available if the server administrator has configure BASE to use it.
- Organisation
-
The name of the organisation you work for or represent (optional).
- Address
-
Your postal address as it should be printed on letters to you (optional).
- Phone
-
Your phone number (optional). You may enter multiple phone numbers, for example your work phone number and a mobile number.
- Fax
-
Your fax number (optional).
- Url
-
An URL to your home page or your organisation's home page (optional).
Press to save the changes or to abort.
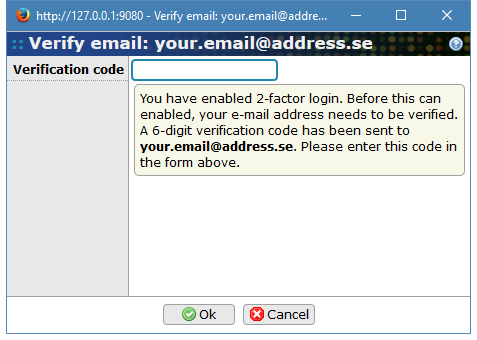
If you enable 2-factor login or change your email address while it is enabled, BASE will send out an email with a verification code and display this dialog. You need to enter the verification code to enable 2-factor login. If the code is incorrect or if you cancel this dialog 2-factor login will be disabled.
Use the menu to bring up the other information dialog.
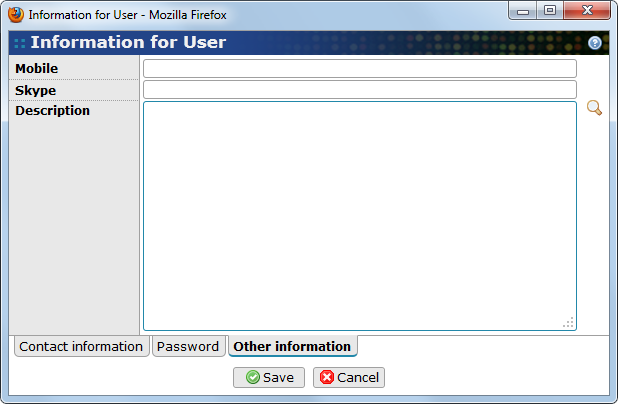
This dialog has three tabs, Contact information, Password and Other information (selected).
The look of the Other information tab can differ a bit between different servers, depending on what settings the server is installed with. There are three inputs in a fresh BASE installation but it is only the Description text area that is static, the others can be removed or more fields can be added (managed by the server administrator). The three fields, included in a the BASE installation, are
- Mobile
-
Your mobile number(Optional).
- Skype
-
Your Skype contact information(Optional).
- Description
-
Text area where you can put useful information that couldn't be stored anywhere else(Optional).
Press to save the changes or to abort.
Use the menu to bring up the change password dialog.
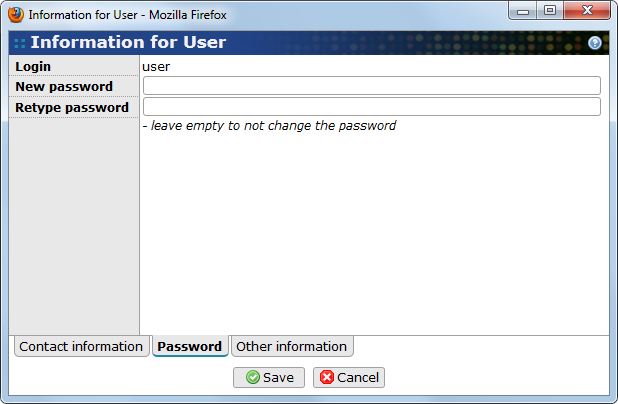
This dialog has three tabs, Contact information, Password (selected) and Other information.
- New password
-
Enter the new password.
- Retype password
-
Retype the same password. You must do this to avoid spelling mistakes.
|
Multi-user accounts |
|---|---|
|
If you are using a multi-user account, for example a demo-account, you do not have permission to change the password. |
|
Empty passwords |
|---|---|
|
If you leave both fields empty the password will not be changed. It is not possible to have an empty password. |
Use the menu to bring up the preferences dialog. This dialog has three tabs, Appearance, Plugins and Recent items.

This tab contains settings that affect the appearance of the web client.
- Font size
-
Select a basic font size. You can choose between five sizes: extra small (XS), small (S), medium (M), large (L) and extra large (XL). The default font size is medium.
- Scale factor
-
The scale factor affects the size of pop-up windows. This setting exists because different browsers render pages differently. If you often find that pop-up windows are too small you can change this setting to make them bigger.
Note The scale factor is automatically changed if the font size is changed.
- Display long texts
-
This setting is used to control how long description texts are displayed in tables and other places with limited space. There are three settings:
- Always: The full text is always displayed. This may cause tables, etc. to become hard to read since cells will automatically grow to be able to display the full text.
- On hover: A short version of the text is displayed and the full text is automatically displayed when the mouse is moved over the text. Texts that are not fully visible are indicated with a dotted line to the right.
- On click: A short version of the text is displayed and the full text is displayed when the mouse is clicked somewhere on the short text. Texts that are not fully visible are indicated with a grey line to the right.
![[Warning]](../../gfx/admonitions/warning.png)
Warning The 'On click' mode may not perform so well if lots of items are displayed in a single list. This is particularly so with Internet Explorer (version 7) which is 5-10 times slower than Firefox to render the page. If you experience problems with this mode you should either use a different mode or display less items on a single page. - Toolbar
-
You may choose if the toolbar buttons should have only images, only text or both images and text. The default is that they have both images and text.
- Ratio color range
-
Select three colors to use when displaying data that is suitable for color coding, for example the intensity ratio in two-color experiments. The default setting is blue-white-yellow. The list of presets contains other useful color combinations (for example, the BASE version 1 red-yellow-green) and the most recently used color combinations.
- Date format
-
A format string describing how dates should be displayed. We support all formatting options supported by the Java language. For more information see: SimpleDateFormat documentation The most useful format patterns are:
- yy: two-digit year
- yyyy: four-digit year
- MM: two-digit month
- MMM: month name (short)
- MMMM: month name (full)
- dd: two-digit day in month
The list of presets contains the most commonly/recently used date formats.
- Date-time format
-
A format string describing how dates with times should be displayed. We support all formatting options supported by the Java language. For more information see: SimpleDateFormat documentations The most useful time-format patterns are:
- HH: two-digit hour (0-23)
- hh: two-digit hour (1-12)
- a: AM/PM marker
- mm: two-digit minute
- ss: two-digit second
- Decimals
-
The base number of decimals to display for numerical floating point values. The default is 2. This setting is used for values between 1 and 10. For higher or lower values, the number of decimals is adapted in order to not loose information (eg. 0.0059 instead of 0.01) or give the impression of very high precision (eg. 135000 instead of 135000.00).
- Thousands separator
-
Specifies a separator character for grouping large numeric values into groups of 3 digits. It is possible to choose between no separator, space and comma. For example: 101,456,998.
- Dialogs
-
Check the Remember positions option to let BASE remember the position and size of dialogs so that they always open in the same place as the last time. The positions are remembered during the current session only and are forgotten if the browser is closed.
- Start page
-
Select the start page that should be displayed after logging in to BASE. The default and only built-in start page is the . Other start pages may be enabled by extensions.
Problems with the start page If there are problems with the selected start page it may prevent the user from accessing BASE. In the worst scenario all that is displayed is a cryptic error message. In this case, it is good to know that holding down either one of the ALT or CTRL or SHIFT keys while clicking the button will force BASE to use the regular start page.
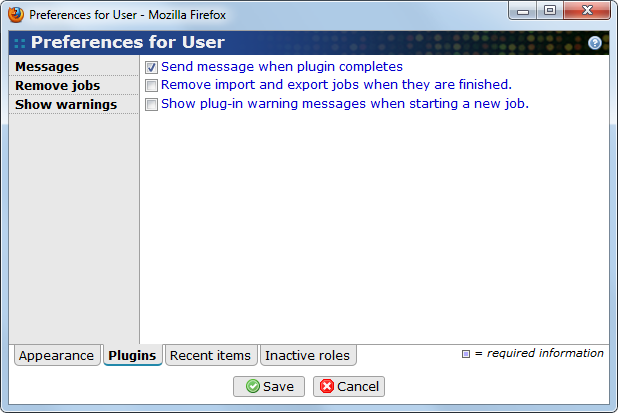
This tab contains settings that affect plug-in execution.
- Messages
-
Mark the checkbox if you want to have a message sent to you when a plug-in completes execution. This setting can be overridden each time you start a plug-in. You'll receive the message as a notification in BASE, but it may also be possible to get the message as an email.
- Remove jobs
-
This checkbox should be marked if you want the jobs, done by import or export plug-ins, to be marked as removed if they finished successfully. This setting can be overridden each time you start a plug-in.
- Show warnings
-
This checkbox should be marked if you want to show warning messages from plug-ins in the Select plug-in dialog. Warning-level messages usually originates from plug-ins that are unrelated to the current task and are only of interest to plug-in developers. Error messages that are related to the current task are always shown.
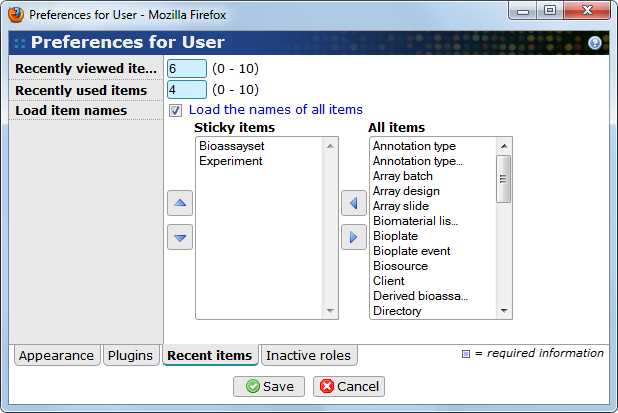
This tab contains settings that affect the Recent items menu and selection lists in many edit dialogs.
- Recently viewed items
-
The number of recently viewed items to remember. The default is to remember 6 items. The remembered items will be displayed in the Recent items menu in the menu bar.
- Recently used items
-
The number of recently used items to remember. The default is to remember 4 items. The remembered items will be displayed in edit dialogs where they have been used before. Each type of edit operation has it's own list of remembered items. For example, there is one list that remembers the most recently used protocols when creating a sample, and there is another list that remembers the most recently used scanners when creating a scan.
- Load the names of all items
-
If checked, the names of the items will be loaded and displayed in the menu, otherwise only the ID and type of item is displayed.
- Sticky items
-
Always remember the last viewed item of the selected types. For example, if you have selected Experiment as a sticky item, the last viewed experiment will be remembered even if you view hundreds of other items. Use the arrow buttons to move item types between the lists and sort the sticky items list. Sticky items will be displayed in the Recent items menu in the menu bar.
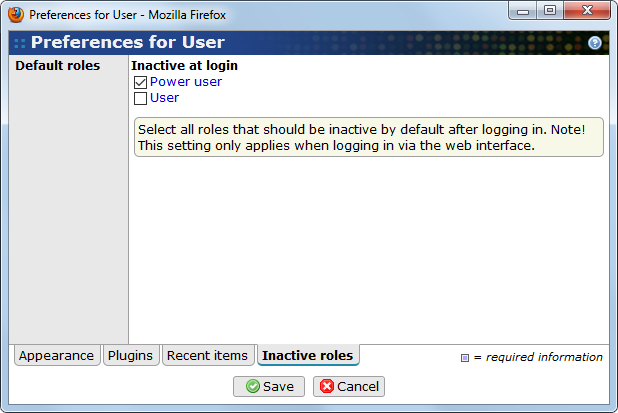
 With this tab you can control which roles that
are active or inactive after logging in.
This is, for example, useful if you have a power user
role that is rarely needed. Setting that role as
Inactive at login prevents
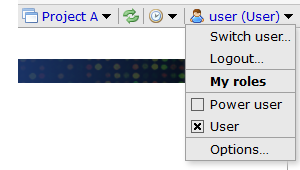
you from accidentally do things by mistake. When you need
the full power user role, it can easily be
activated from the popupmenu you get when clicking on your own
name in the upper right corner.
With this tab you can control which roles that
are active or inactive after logging in.
This is, for example, useful if you have a power user
role that is rarely needed. Setting that role as
Inactive at login prevents
you from accidentally do things by mistake. When you need
the full power user role, it can easily be
activated from the popupmenu you get when clicking on your own
name in the upper right corner.
- Default roles - Inactive at login
-
All roles that you have been assigned are listed here. Put a checkbox before those roles that should not be active after logging in. Note that the settings only apply when using the web client. Logging in via other means (for example the FTP server) always enables all assigned roles.