This chapter is for those who intent to contribute to the BASE user documentation. The chapter contains explanations of how the documentation is organized, what the different parts is about and other things that will make it easier to know where to insert new text.
The documentation is written with the docbook standard, which is a bunch of defined XML elements and XSLT style sheets that are used to format the text. Later on in this chapter is a reference, over those docbook elements that are recommended to use when writing BASE documentation. Further information about docbook can be found in the on-line version of O'Reilly's DocBook: The Definitive Guide by Norman Walsh and Leonard Muellner.
The book, which is the main element in this docbook documentation, is divided into four separated parts, depending on who the information is directed to. What kind of documentation each one of these parts contains or should contain is described here below.
- Overview documentation
The overview part contains, like the name says, an overview of BASE. For example an explanation about what the purpose with BASE is, the terms that are used in the program and other general things that anyone that is interested in the program wants/needs to know before exploring it further.
- User documentation
This part contains information that are relevant for the common BASE-user. More or less should everything that a power user role or an user role needs to know be included here.
- Administrator documentation
Things that only an administrator-role can do is documented in this part. It can be how to install the program, how to configure the server for best performance or other subjects that are related to the administration.
- Developer documentation
Documentation concerning the participation of BASE development should be placed in this part, e.g. coding standards, the java doc from the source code, how to develop a plug-in etc.
Before writing any documentation in BASE there are a couple of things, some rules and standards, to have in mind.
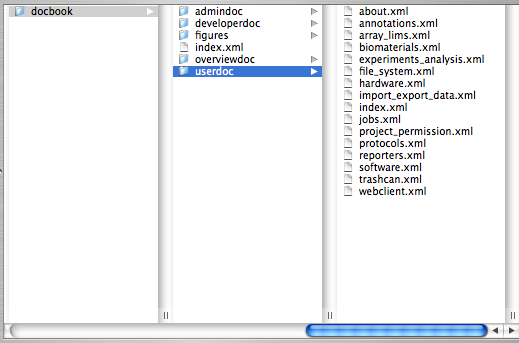
The source files of the documentation are located in
<base-dir>/doc/src/docbook.
The different parts of the documentation are organized into separate folders and
each one of the folders contains one index file and one file for each chapter in
that part. The index file joins the chapters, in current part/folder, together and
does not really contain any text. The documentation root directory also contains an
index.xml
file which joins the index files from the different parts together.
Most files in the documentation, except the index files, represents a chapter. Here is how to create a new chapter and include it in the main documentation:
Create a new XML-file in the folder for the part where the new chapter should be included. Give it a name that is quite similar to the new chapter's title but use
_instead of blank space and keep it down to one or a few words.-
Begin to write the chapter's body, here is an example:
Example 30.1. Example of a chapter
<?xml version="1.0" encoding="UTF-8"?>
<!DOCTYPE chapter PUBLIC
  "-//Dawid Weiss//DTD DocBook V3.1-Based Extension for XML and graphics inclusion//EN"
  "../../../../lib/docbook/preprocess/dweiss-docbook-extensions.dtd">

<chapter id="example_chapter">
   <?dbhtml dir="folder name to put the chapter's files in"?>
   <title>Example of a chapter </title>
   <para>
      …
   </para>
   <sect1 id="example_chapter.sect1">
      <title>Example of top level section </title>
      <para>
         …
      </para>
      <sect2 id="example_chapter.sect1.sect2">
         <title>Example of second level section </title>
         <para>
            …
         </para>
         <sect3 id="example_chapter.sect1.sect2.sect3">
            <title>Example of third level section</title>
            <para>
               …
            </para>
         </sect3>
      </sect2>
   </sect1>
</chapter>
![[Note]](../../gfx/admonitions/note.gif)
Note Do not forget to include the
dbhtmltag with the attributedirset to the value that the chapter's output folder should have as a name. -
The last step is to get the new chapter included in the documentation. This is done by including the file's name in the file
index.xmlthat's located in the current part's folder. The following example shows how the chapter that was created above is included in the user documentation part.Example 30.2. Include a chapter
<part id="userdoc">
   <title>User documentation</title>
   <include file= "about.xml"/>
   <include file="webclient.xml"/>
   <include file="project_permission.xml"/>
   <include file="trashcan.xml"/>
   <include file="file_system.xml"/>
   <include file="jobs.xml"/>
   <include file="reporters.xml"/>
   <include file="annotations.xml"/>
   <include file="protocols.xml"/>
   <include file="hardware.xml"/>
   <include file="example_chapter.xml"/>
   <include file="software.xml"/>
   <include file="array_lims.xml"/>
   <include file="biomaterials.xml"/>
   <include file="experiments_analysis.xml"/>
   <include file="import_export_data.xml"/>
</part>
Order of chapters The chapters will come in the same order as they are included in the index file.
Now it's only to go ahead with the documentation writing.
We have configured docbook to create a new sub-directory for each
<chapter> and a new output file for each
<sect1> tag. In most cases this
gives each page a relatively good size. Not too long and not too short.
However, if a chapter contains many small <sect1>
sections (for example, Chapter 4, Resources), you end up with many
pages with just a few lines of text on each page. This is not so
good and can be avoided by adding chunked="0"
as an attribute to the <chapter> tag, for example:
<chapter id="resources" chunked="0">
This will stop the chunking of <sect1>
sections in this chapter.
On the other
hand, if you have a <sect1>
that contains many long <sect2>
sections you might want to put each <sect2>
section in a separate chunk:
<sect1 id="sect.with.large.sect2" chunked="1">
Common to all elements is that they have an id
attribute that can be used to identify the
element with. The value must be unique for the entire documentation.
Most of the elements that are used inside the BASE documentation do not
need to have an id if they do not are used in any cross references from other part of
the text.
There are some elements that always should have the
id
set. Which these elements are and how the
id
should look like for each one of those is described below. All values should be as
short as possible and associated to the current element. The
id
value should only consist of the lowercase characters a-z, '_' instead of blank
spaces and '.' to symbolize the different levels in the document.
- chapter
-
The chapter should have an
idthat is identical or almost identical to the chapter's title.chapter_title
- sect1-sect5
-
The creation of a section's id is done by using the upper level's id and add the section's title or a part of the title. For <sect2> it should be like this;
chapter_title.sect1_title.sect2_title
- examples
-
The naming of an example's
idis a bit different compare to the chapter's and section's id. It should begin with the chapter's id followed byexamplesand the caption of the example.chapter_title.examples.example_caption
- figures
-
The figure's
idshould have the following layoutchapter_title.figures.figure_name
This documentation is also use to create the help texts that show up
in the web client when clicking on the question mark icons.
The parts of the text that also should be used as help texts in the web must be
inside
<helptext>
tags. These texts will be exported to a XML-file at the same time as the
HTML-documentation is generated. The generated XML-file is compatible with the help
text importer in BASE and will be imported when running the update script or
installation script.
|
Note |
|---|---|
The
|
The tag supports the following attributes
-
external_id Is used to identify and to find a help text in the web client. The BASE web client already has several IDs to help texts defined, it could therefore be a good idea to have a look in the program to see if there already is an external id to use for the particular help text.
-
title Is directly connected to the name/title property for a help text item in BASE.
-
webonly If set to a non-zero value, the contents of the tag will not be outputted in the HTML or PDF documentation. This is useful for minor functionality that is not important enough to be mentioned in the documentation but has a help icon in the web client.
Example 30.3. How to use the help text tag
<sect1>
   <helptext external_id="helptexts.external.id" title="The title">
      The text that also should be used as a helptext in the program.
      <seeother>
         <other external_id="other.external.id">
            Related info here...</other>
      </seeother>
   </helptext>
</sect1>
From time to time, it may happen that you find that
some parts of the text inside a <helptext>
tag does not make sense. It may, for example, be a reference to
an image or an example, or a link to another chapter or
section. Put a <nohelp>
tag around the problematic part to avoid it from being
outputted to the help texts.
<nohelp>see <xref linkend="chapter11" /></nohelp>
You can use <seeother> and
<other>
to create links between different help texts. The
<seeother>
tag does not have any attributes and is just a container for one or more
<other> tags. Each tag requires a single attribute.
-
external_id The external ID of the other help text to link to.
<seeother>
  <other external_id="userpreferences.password">Change password</other>
  <other external_id="userpreferences.other">Other information</other>
</seeother>
We recommend that you place the links at the end of the help text section. The links will not show up in the HTML or PDF version.
Import the generated XML-file manually by uploading it from the
data
directory to the BASE-server's file system and then use the help text importer
plug-in to import the help text items from that file.
The help texts can also be imported by running the TestHelp test program. In short, here are the commands you need to import the help texts:
ant docbook
ant test
cd build/test
./run.sh TestHelp
Those who have checked out the documentation source from repository or got the
source from a distribution package needs to compile it to get the PDF and HTML
documentation files. The compilation of the documentation source requires, beside Ant, that the XML-parser
Xsltproc is installed on the local computer. More information about
XsltProc and how it is installed, can be found at
http:
|
Note |
|---|---|
There is an xml-parser in newer java-versions that can be used instead of XsltProc but the compilation will most likely take much much longer time. Therefore it's not recommended to be used when generating/compiling the documentation in BASE. |
There are two different types of format that is generated from the documentation
source. The format to view the documentation on-line will be the one with
chunked HTML pages where each chapter and section of first level are on separate
pages/files. The other format is a PDF-file that are most useful for printing
and distribution. Those two types of output are generated with the ant-target:
ant docbook. This documentation is also generated with
ant dist, which will put the output files in the right location for distribution with
BASE.
The purpose with this section is to give an overview of those docbook elements that are most common in this documentation and to give some example on how they should be used. There will not be any detailed explanation of the tags here, instead the reader is recommended to get more information from Docbook's documentation or other references.
| Define | Element to use | Comments |
|---|---|---|
| Chapter |
<chapter>
|
|
| Title |
<title>
|
Example 30.1, “Example of a chapter” shows how this can be implemented |
| Paragraph |
<para>
|
Used almost everywhere around real text. |
| Top-level subsection |
<sect1>
|
See
the section called “
The
id
attribute
”
|
| Second level section |
<sect2>
|
See
the section called “
The
id
attribute
”
|
| Third level section |
<sect3>
|
See
the section called “
The
id
attribute
”
|
| Fourth level section |
<sect4>
|
|
| Fifth level section |
<sect5>
|
These elements should be used to mark up words and phrases that have a special meaning in a coding environment, like method names, class names and user inputs, etc.
| Define | Element to use | Comment |
|---|---|---|
| Class name |
<classname>
|
The name of a (Java) class.
docapi-attribute
can be used to link the class to it's Javadoc (only
HTML-version). This is done by setting the attribute to the
package name of the class, like
net.sf.basedb.core |
| Interface name |
<interfacename>
|
The name of an (Java) interface. Has a
docapi-attribute
which has the same functionality as in
classname above.
|
| User input |
<userinput>
|
Text that is entered by a user. |
| Variable name |
<varname>
|
The name of a variable in a program. |
| Constant |
<constant>
|
The name of a variable in a program. |
| Method definition |
<methodsynopsis>
|
See Example 30.4, “ Method with no arguments and a return value ” |
| Modifier of a method |
<modifier>
|
See Example 30.4, “ Method with no arguments and a return value ” |
| Classification of return value |
<type>
|
See Example 30.4, “ Method with no arguments and a return value ” |
| Method name |
<methodname>
|
See Example 30.4, “ Method with no arguments and a return value ” |
| No parameter/type |
<void>
|
See Example 30.4, “ Method with no arguments and a return value ” |
| Define a parameter |
<methodparam>
|
See Example 30.5, “ Method with arguments and no return value ” |
| Parameter type |
<type>
|
See Example 30.5, “ Method with arguments and no return value ” |
| Parameter name |
<parameter>
|
See Example 30.5, “ Method with arguments and no return value ” |
Follow one of the examples below to insert a method definition in the document.
Example 30.4. Method with no arguments and a return value
<methodsynopsis language="java">
   <modifier>public</modifier>
   <type>Plugin.MainType</type>
   <methodname>getMainType</methodname>
   <void />
</methodsynopsis>
Example 30.5. Method with arguments and no return value
<methodsynopsis language="java">
   <modifier>public</modifier>
   <void />
   <methodname>init</methodname>
   <methodparam>
      <type>SessionControl</type>
      <parameter>sc</parameter>
   </methodparam>
   <methodparam>
      <type>ParameterValues</type>
      <parameter>configuration</parameter>
   </methodparam>
   <methodparam>
      <type>ParameterValues</type>
      <parameter>job</parameter>
   </methodparam>
</methodsynopsis>
Docbook has some elements that can be used to symbolize GUI items in a program. Following list contains the ones that are most common in this document.
| Define | Element to use | Comment |
|---|---|---|
| Button |
<guibutton>
|
|
| Label |
<guilabel>
|
|
| Menu choice |
<menuchoice>
|
|
| Menu |
<guimenu>
|
|
| Submenu |
<guisubmenu>
|
|
| Menu item |
<guimenuitem>
|
|
| Icon |
<guiicon>
|
Example 30.6, “Describe a menu choice” shows how the menu choice in figure Figure 30.2, “Menu choice” can be described.
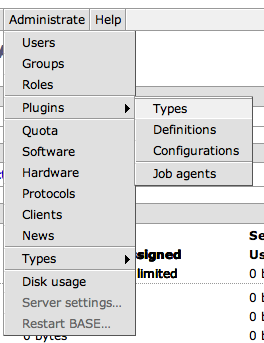
Example 30.6. Describe a menu choice
<menuchoice>
   <guimenu>Administrate</guimenu>
   <guisubmenu>Plugins</guisubmenu>
   <guimenuitem>Types</guimenuitem>
</menuchoice>
In the text it will look like this: → →
Images and figures are normally implemented like the following example. The
image-file must be located in
doc/src/docbook/figures,
otherwise the image will not be visible in the generated output files.
Example 30.7. Screen-shot in the documentation
Figure 6.1, “The home page” is implemented with the following code
<figure id="docbook.figures.menuchoice">
  <title>The home page</title>
  <screenshot>
    <mediaobject>
      <imageobject>
        <imagedata
          scalefit="1"
          width="100%"
          fileref="figures/homapage.png" format="PNG"
        />
      </imageobject>
    </mediaobject>
  </screenshot>
</figure>
![[Warning]](../../gfx/admonitions/warning.gif) |
Warning | ||
|---|---|---|---|
|
When using images in docbook you will always have problems with image resolution and scaling. Since we are generating output for both HTML and PDF it is even worse. What we have found to work is this:
|
![[Tip]](../../gfx/admonitions/tip.gif)
Following describes how to insert an example in the documentation.The examples in this document are often some kind of program listing but they can still be examples of something else.
|
Use spaces instead of tabs for indentation |
|---|---|
Use spaces for indentation in program listing, this is because of the tab-indentations will sooner or later cause corrupt text. |
- The verbatim text is split into several lines if the text contains more then 80 characters. This could give the text an unwanted look and it's therefore recommended to manually insert new lines to have control over layout of the text
-
We have added support for syntax highlighting of program
examples in the HTML version. To enable it add a
languageattribute with one of the following values:java,xmlorsql. The highlighting engine support more languages. To add support for those in docbook, change thecustomized.chunked.xslfile. The syntax highlighting engine doesn't handle markup inside the<programlisting>tag very well. You should avoid that. By default, java program examples include line numbering, but not xml examples. To disable line numbering for java add:nogutterto thelanguageattribute:<programlisting language="java:nogutter">. To enable line numbering for xml add:gutterto thelanguageattribute:<programlisting language="xml:gutter">.
Example 30.8. Example in the documentation
This shows how Example 26.2, “A typical implementation stores this information in a static field” is written in the corresponding XML-file.
<example id="net.sf.basedb.core.plugin.Plugin.getAbout">
   <title>A typical implementation stores this information
      in a static field</title>
   <programlisting language="java">
private static final About about = new AboutImpl
(
   "Spot images creator",
   "Converts a full-size scanned image into smaller preview jpg " +
	 "images for each individual spot.",
   "2.0",
   "2006, Department of Theoretical Physics, Lund University",
   null,
   "base@thep.lu.se",
   "http://base.thep.lu.se"
);

public About getAbout()
{
   return about;
}
</programlisting>
</example>
The admonitions that are used in this document can be found in the table below.
| Define | Element to use | Comment |
|---|---|---|
| Warning text |
<warning>
|
|
| Notification text |
<note>
|
|
| A tip |
<tip>
|
|
| Important text |
<important>
|
|
| Something to be cautious about |
<caution>
|
Following items can be used to define different kind of lists in the documentation. Some common elements for the lists are also described here.
| Define | Element | Comment |
|---|---|---|
| None-ordered list |
<itemizedlist>
|
|
| Term definition list |
<variablelist>
|
|
| Ordered list |
<orderedlist>
|
|
| List item |
<listitem>
|
The example below shows how to create a list for term definition in the text.
Example 30.9. Example how to write a variable list
<variablelist>
   <varlistentry>
      <term>Term1</term>
      <listitem>
         <para>
            Definition/explanation of the term
         </para>
      </listitem>
   </varlistentry>

   <varlistentry>
      <term>Term2</term>
      <listitem>
         <para>
            Definition/explanation of the term
         </para>
      </listitem>
   </varlistentry>
</variablelist>| Define | Element | Comment |
|---|---|---|
| Cross reference |
<xref linkend="">
|
Use this to Link to other parts of the document. |
| Cross reference with own text |
<link>
|
Can be used as an alternative to
xref
|
| External URLs |
<ulink url="">
|
Example 30.10. Links
<xref linkend="docbook.usedtags.links" />
<link linkend="docbook.usedtags.links">Link to this section</link>
<ulink url="http://base.thep.lu.se">Base2's homepage</ulink>
The first element will autogenerate the linked section's/chapter's title as a
hyperlinked text. As an alternative to
xref
is
link
that lets you write your own hyperlinked text. The third and last one should be
used to link to any URL outside the document.